Showing posts with label healthy living. Show all posts

Monday, August 19, 2013

So Long, Summer: Roasted Summer Vegetables “Ratatouille” style


20130819_204538

I’ve mentioned how much adored Ratatouille (the movie, not the dish) – I mean, it’s a movie that appeals to my love of adorable cartoon animals and cooking.  I had been meaning to re-create the beautiful layered ratatouille dish (spoiler alert!) that won over the die hard food critic’s heart since the movie came out in 2007, and since I found this interpretation of it on smitten kitchen. But life, laziness, and lack of all the ingredients kept me from doing so. 

Until tonight. Tonight, I came home and found the eggplant, zucchini, and yellow squash that J. brought home from the farmer’s market.  Tonight, no lack of ingredient, overripe tomatoes, or shortage of time was going to stop me. I didn’t bother to consult Deb’s recipe, for fear that I would find I was missing something and would be discouraged.  Instead, I turned up the oven, sliced the vegetables, and got to work.

It turns out that my version is actually not too far off from Deb’s recipe. I roasted the vegetables at a higher temperature in the hope that they would cook faster, which they did. I completely forgot about the tomato puree, which made this dish more simply roasted vegetables rather than ratatouille.  It came out a bit dry, but I didn’t mind.  The tomatoes provided the extra juice that it needed for me.  I also used fresh oregano and basil, which are decidedly more Italian than French.  But I still enjoyed the chance to cook with summer vegetables while they were still in their peak season.

Roasted Vegetables “Ratatouille-style”

Adapted from Smitten Kitchen

Serves 4 as a side

Ingredients:

  • 1 large eggplant, cut in half lengthwise, and then sliced in 1/4 inch slices
  • 1 zucchini, sliced
  • 1 yellow squash, sliced
  • 1 Italian pepper, sliced (can substitute with bell pepper)
  • 1 small onion, sliced
  • 1 tomato, diced
  • 3-4 cloves garlic, thinly sliced
  • 3 Tbs olive oil, divided in half
  • 2 Tbs finely chopped oregano, divided
  • 1 Tbs fresh basil, torn
  • dash of red pepper flakes
  • salt and pepper to taste

Method:

Preheat oven to 400 degrees.  Slice vegetables into slices about 1/4 inch thick. Drizzle half the olive on the bottom of a roasting pan.  Layer vegetables in the pan.  Drizzle with the rest of the olive oil, and sprinkle 1 Tbs oregano, red pepper flakes, and salt and pepper to taste.  Roast in the oven for about 30 minutes.  Remove from oven.  Sprinkle tomato and remaining herbs.  Drizzle a little extra olive oil and adjust seasonings, if desired. 

Monday, August 12, 2013

So Long Summer: Watermelon and Feta Salad


20130812_195652


From now until the end of the summer, I have started a “So Long Summer” series, in which I will be highlighting my favorite summer fruits and vegetables, so we can all enjoy them one last time (or three or four more times, as the case may be), before they’re gone for the season.  First up, Watermelon and Feta salad!

I first learned this salad from reading Peanut Butter Fingers, one of my favorite healthy living blogs.  At first, I will admit it seemed kind of weird, but intriguing to me.  At the time I read about it, I happen to have half a watermelon and feta cheese in the fridge,  so I decided to give it a whirl.  Turns out, watermelon and feta are a winning combination! Something about the tangy salty creaminess of the feta makes it the perfect contrast to the cold and sweet of the watermelon.  J. and I have made it several times since then, and even brought to a party where it was a big hit. 

Watermelon and Feta Salad

Adapted from Peanut Butter Fingers

Ingredients:

Note: The measurements are very fluid and you can use as much or as little as you want – I just eyeballed these measurements

  • 2 cups seedless watermelon, cubed
  • 2 cups arugula or any mixed salad greens you have (the peppery arugula goes great with the watermelon, but really any mix of greens will do)
  • Pinch of kosher salt and freshly ground pepper
  • A drizzle of olive (probably about 2-3 tsp)

Method:

Place a layer of salad greens into a bowl.  Layer the watermelon and feta on top.  Sprinkle salt and pepper.  Just before serving, drizzle olive oil on top.  Serves 2.

Monday, August 5, 2013

Fuji Apple and Gorgonzola Salad


20130717_200633

A few weeks ago, I had a lovely lunch with the even lovelier book club ladies, at the Iron Monkey, a cool bar/restaurant in Jersey City.  Since I wanted to keep the meal nice and light, I ordered the Fuji Apple and Endive Salad.  This salad is so simple, yet oh so tasty – the crisp sweetness of the apple was complemented nicely by the sweet and salty candied pecans and the creamy tang of the gorgonzola.  I enjoyed this salad so much I knew I had to try to recreate at home.  I made a few variations with what I had on hand at home – I may be biased, I actually think my version is better.

Fuji  Apple and Gorgonzola Salad

Ingredients:

For the salad:

  • 2-3 cups Mixed salad greens
  • 1 Fuji apple, sliced
  • 1/2 cup crumbled gorgonzola cheese
  • 1/4 mixed nuts chopped

For for the apple cider vinaigrette:

  • 1/3 cup apple cider vinegar
  • 1/8 cup olive oil
  • 1 tsp honey
  • pinch of salt and pepper

Layer salad ingredients into a bowl.  In a separate bowl whisk together dressing ingredients.  Drizzle dressing lightly over salad. Serves 2.

Monday, July 29, 2013

Is soy bad for you?


Last week, I was having lunch with a female associate, and two male partners at my firm.  The associate announced that she recently became a vegan.  One of the partners asked her, "So what do you eat then, soy?” Her curt response was, “Soy is bad for you.”

This statement got my attention, because the culture I was raised on is pretty much based on soy (and rice, of course).  This statement also got the male partner riled up because apparently, edamame is the only “vegetable” he and his wife could get their 10 year old son to eat.  But the associate was adamant, “Google it.  There are articles about how bad it is for you. It messes with your hormones.  Eating a soybean is the equivalent of eating four birth control pills. And soy is in everything.”

So I did exactly that.  In my highly precise and in depth investigation (i.e. googling “is soy bad for you?”) And here are my takeaways from the sampling of articles I read:

  • Yes, soy consumed in large quantities can affect your hormones because soy plants contain an estrogen-like hormone.  This is why many postmenopausal women take soy to relieve their symptoms. But it is not the equivalent of eating four birth control pills.
  • Edamame is soy in its purest form, and carries the most health benefits.  It is when soy is processed that it loses its nutritional value.  Edamame is actually a great source of a lean protein.  (So the partner’s kid can keep eating edamame without growing man-boobs).
  • Soy is added into a lot of processed foods such as cereal and protein bars because it is cheap.  Soy in its processed form may have detrimental effects.  So considering that processed soy is not as good for you as unprocessed, the benefits may not outweigh  the negative effects.
  • Exceptions to this rule are fresh tofu and fermented soy, such as tempeh and miso – all products that I grew up with and ate in significant quantities as a kid.  So I can rest assured.
  • As I have always believed when it comes to eating - “all things in moderation” – so as long as you consume soy, (and anything else really) in moderation, you will probably be fine. 

Here are the articles I read to draw these conclusions.  (Once again, this is by no means an exhaustive list, but rather my 10 second Google search).

What do you think?  Soy – yay or nay?

Monday, July 15, 2013

A “Chopped” Style dinner


I hope you enjoyed my recap on poutine last week.  I have at least one more recap on Montreal coming up, which I hope to share with you all later this week.  But first, dinner!

20130715_204256

Tonight’s dinner looks atrocious, but I promise you it was tasty! And good for you too!

I came home tonight and threw together what J. calls a “Chopped”-style dinner.  “Chopped” is easily my favorite cooking reality TV show – it’s so addictive to watch! For those of you haven’t seen the show (where have you been?!), the show begins with four contestants and one is eliminated from each round by a panel of judges.  Each round is a course (appetizer, entrĂ©e, and dessert), and each course the contestants are given a “mystery basket” to prepare the course.  The mystery basket always has some hodgepodge of ingredients that don’t seem to go together, like easy cheese, “duck white kidneys,” brown bread in a can, or one episode, an emu egg.  (By the way, if you don’t know what duck white kidneys are… Google it, you’ll be surprised!)

Anyway, so I came home and found a hodgepodge of ingredients in the fridge that had to be used – half a bunch of wilting kale, a quarter of a browning avocado, and pork tenderloin.  So I threw them all together in a pan, along with garlic, some salsa and came together with this Mexican inspired “stir-fry.” It’s not the prettiest dish -- I would definitely get “chopped” for presentation, but it came out to be spicy and flavorful. 

Spicy Pork and Kale Stir Fry

Serves 2-3

Ingredients:

  • 6 oz. lean pork tenderloin, cut into bite size pieces
  • 1/2 bunch of kale (about 17 stems), stems removed and roughly chopped
  • 2 large cloves of garlic, minced
  • 1 zucchini
  • 3/4 cup prepared salsa
  • 1-2 Tbs olive oil

Seasonings to taste:

  • Cumin
  • onion powder
  • chili powder
  • red pepper flakes
  • cayenne pepper
  • salt and pepper
  • a few dashes of hot sauce

Accompaniments :

  • Avocado
  • Plain yogurt or sour cream
  • Corn tortillas

Method:

Heat about 1 Tbs olive oil over medium heat.  Season pork with a little salt, pepper and cumin.  Add pork and cook until browned on all sides (about 1 minute on each side).  Remove heat from pan and set pork aside on a dish.

Add another Tbs of olive to the pan and bring it back to medium heat.  Add zucchini and cook for about 1 minute.  Add garlic (see note on cooking garlic*), and cook for about 30 seconds or until fragrant.  Push zucchini and garlic to the sides of the pan, forming a well.  Cook kale in the well, until wilted. Add seasonings to taste. Stir in cooked pork and salsa.  Cook for about another minute until heated through.  Serve with optional toppings or just eat it as is!

*Note:

To avoid burning the garlic, I learned this method from Cooks Illustrated, which I have described here on the blog, but I finally took a picture.  Push the vegetables to the sides of the pan, forming an empty space in the middle of the pan.  Add 1/2 tsp of olive oil in the middle of the pan, and then add the garlic to the oil.  What you have will look like this:

20130715_203723

Once the garlic has been cooking for about 30 seconds, stir to combine it with the vegetables. 

Monday, July 8, 2013

Cleaning out the Fridge before a Vacation


June has been a busy month of travel! I promise I have some travel recaps ready for you all, but first here’s what I made BEFORE I went away.

For those of you who have been following my Facebook page, you may remember when I posted this picture:

20130605_195130

The caption read: What do you do when you have a ton of vegetables left in your fridge before you go on vacation? 

So this is what I came up with:

20130605_203053

Veggie Tacos!

We eat a lot of tacos in our household because they are quick, easy, and relatively healthy.  Usually we just make bean tacos or add some grilled chicken to the mix.  But since I had a ton of vegetables that would spoil while we were away, why not make veggie tacos?

So I chopped up zucchini, yellow squash, onion, bell peppers (one red and one green), grape tomatoes, and garlic, as you see in the lead photo (sans the garlic and onions – I chopped those after I took the photo).  I lightly sauteed all the vegetables (except for the grape tomatoes) in about 1 Tbs of olive over medium heat:


20130605_200339

Once the vegetables were soft (about seven minutes), I added the grape tomatoes, a can of black beans (drained and rinsed), and about 1/3 of jar of salsa that I had left over (probably about a half cup)

20130605_201111

And then I seasoned the mixture with cumin, chili powder, cayenne pepper, salt and pepper to taste.  I let the mixture cook for a few more minutes

While the vegetables were cooking, I heated up corn tortillas, and prepared the toppings – shredded cheddar cheese and sliced avocado!

Here’s the whole spread:

20130605_202247

Then to make the tacos, we scooped a spoonful of the veggie mixture into each tortilla and layered on the avocados and cheese, and a dash of hot sauce.  This works well since we get to personalize how spicy we each want it to be. J. really likes his to be hot and spicy, while I like a medium level of spice.

So next time you have a ton of vegetables in your fridge to use up before going on vacation, consider making these veggie tacos!

Veggie Tacos

Note:  Consider this a “guide” rather than a strict recipe, as you can use whatever vegetables you want to get rid of!

Ingredients:

  • Yellow squash, sliced
  • Zucchini, sliced
  • bell peppers, chopped into small pieces
  • 1/2 onion chopped
  • 2-3 cloves garlic, minced
  • 1/2 cup grape tomatoes, sliced in half
  • 1 can black beans, drained and rinsed
  • 1/2 cup prepared salsa
  • 1 Tbs olive oil
  • 5-6 corn tortillas

The following seasonings to taste:

  • Chili powder
  • Cayenne pepper
  • Cumin
  • Salt and pepper

Toppings:

  • Sliced avocados
  • shredded cheddar cheese
  • sour cream (optional)

Method:

Heat olive oil in a large sautee pan over medium heat.  Add vegetables (except for grape tomatoes) and cook until soft, about 5-7 minutes.  Add grape tomatoes, beans, and salsa, and mix.  Add seasonings to taste, and cook for another 2-3 more minutes for the flavors to develop.

Meanwhile heat tortillas according to package (I heat mine over the stove for about 1 minute on each side, or until they get soft). 

Assemble the tacos by spooning about 2 Tablespoons of the veggie mixture and topping it with cheese and avocados. 

Note: When we made these, J. and I had five tacos between the two of us, and there was a lot of veggie mixture, probably to make another 3-4 tacos.  So I would say this makes about 7-8 tacos, but it really depends on the volume of vegetables you have.

Monday, July 1, 2013

Guest Post: Pomegranate Beet Salad


Hello friends! I just got back from a conference in San Francisco and I am working on some great recaps on my travels, including some more posts on my vacation in Montreal! In the meantime, here is a light and healthy recipe from my friend Rose from Just Prepare It Deliciously! – Cheryl

Hello everyone!! I’m Rose, author of the blog Just Prepare It Deliciously, where I focus on simpler, healthier meals (but with occasional treats too). Cheryl is one of my closest friends and all-time favorite bloggers. She even wrote a guest post for my blog last year so today I’m only too glad to return the favor.

I am especially excited to be writing for Cheryl’s Healthy Living series, which has become my favorite part of Food Judicata. Reading her blog on Mondays always helps motivate me to make a healthy plan for my week.

Regarding this recipe, I love eating salads. There’s just something about the way that your body feels when something so good for you that makes me happy. Not to mention with swimsuit season underway, for me eating healthier is a must.

Like Cheryl, I like to use fruits and vegetables that are in season. When I read that beet season peaks in June, I decided that would be one of my ingredients. Since I had never made any dishes with fresh beets before so this was a new experience for me, I read up on beets on Real Simple. As suggested, I separated the beets from the greens (which you will see photographed below).

Now while I’ve read that many recipes call for beets totally raw, I microwaved my beet for 4-5 minutes in advance of using in this recipe, then peeled and cut it up, which is how my mom preps her beets whenever she makes a beet recipe.

So without further ado…the salad.

Pomegranate Beet Salad

Beet Salad 3

Ingredients:

  • ½ a Pre-packaged Spinach Mix
  • One large Beet, raw or cooked, cut into pieces
  • 3 Tbsp Goat Cheese Crumbles
  • 2 Tbs sliced almonds
  • 3 slices of turkey, torn
  • 3-4 Tbsp Pomegranate Seeds
  • 1 small cucumber, thinly sliced
  • Raspberry Balsamic Vinaigrette Dressing (I used Annie’s Naturals)

Directions:

  1. Pour salad mix into a bowl.
  2. Add beets, goat cheese, almonds, turkey, pomegranate seeds, and sliced cucumber.

Beets 1

    3.   Divide and serve.

Yield: 2 servings

Monday, June 17, 2013

What Really Happened on our Vacation


Last week, J. and I went on a lovely vacation to Montreal. Montreal truly is a beautiful city.  It is also great city to eat very well!  As some of you may know, Montreal’s signature dish is poutine, which is traditionally French fries served with gravy and cheese curds on top.   For my fellow New Jerseyans, I would call it the wackier cousin of disco fries.  And at most restaurants that serve it, you have your pick of toppings which would be as low-brow as sliced hot dogs to as fancy as foie gras.  But no matter how fancy or plain you choose to have it, it’s fantastic.  So of course, we had it no less than three times.

20130610_213522

Mmmm…. poutine…

Since I knew that I would be eating lots of delicious, but rich foods during the trip, before we left, I wrote down a few strategies to try to stay fit.  Here’s how it actually went down…

1) Schedule a workout or two during the trip.  This sort of happened.  We drove to Montreal, so on our way to and from the city, we made an overnight stop in Clifton, NY.  The hotel we stayed at in Clifton Park had a gym, so I was able to squeeze in 20 minute run on the treadmill both times.  We didn’t go running in Mont Royale Park as I envisioned, but we did take a long walk through the park.  And to get to the summit of the park, meant climbing a lot of stairs so I’d like to think of that as a workout!

2) Plan activities that involved a lot of walking.  The location of our hotel helped out a lot for this goal! We stayed at the Quality Hotel in downtown Montreal, which while centrally located in the city, to get to most destinations still involved a 20 minute walk.  (We found that the metro in Montreal did not take us directly to a lot of the places that we wanted to go, and still involved a good amount of walking.) As I mentioned before, we explored Mont Royale Park for a few hours, which had stunning panoramic views of the city.

20130609_105901

A view from Mont Royale Park

We also went for a walk around La Fontaine Parc, which was also pretty…

20130612_132632

I noticed there was a lot of joggers and bikers in both of these parks.  And even a tai chi class going on in Mont Royale Park! People know how to stay active in Montreal.

20130609_110828

Those people you see lined up in the middle of the picture are practicing tai chi!

3) Split entrĂ©e/appetizer/dessert with J. We did this a lot.  It’s a great way to enjoy a taste of different foods, and is friendl(ier) on the figure and the budget!  Fortunately, in Canada, most of the restaurants we went to did not serve gargantuan portions as they do in the US, so I found that to be quite helpful.  (It also meant that we could actually finish our plates, and not waste food. Even as an adult, I still can hear my grandma’s voice scolding me for wasting food when I don’t clean my plate). 

20130608_213417

J. and I enjoyed our first experience with escargot!

4) Pack some healthy snacks. I packed granola, dried apricots, cashews, and banana chips.  The original plan was to mix them together to make a homemade trail mix.  But there just wasn’t time for that, so instead we just snacked on them in the hotel room, straight out of the containers

While we made it to the Jean-Talon Market, we didn’t buy any snacks there, since it was close to lunch time when we got there.  We did bring home maple syrup and maple butter!

20130610_110941

5) Relax.  There was a lot of relaxing during the trip! Unlike our Austin trip, where I had a long list of restaurants I wanted to try mapped out on a customized Google map, I only picked a few key places I wanted to try in Montreal.  The result was our trip was a lot more exploratory and improvised. We stumbled on some really great finds that weren’t on the list.  On our first night there, we went to Grumpy’s, which was a bar with a laid-back atmosphere that had live music the night we were there.  J. really liked this bar a lot.  We also stumbled upon a comedy club, Comedyworks, which featured some really funny comedians!

So in retrospect, the trip was not as unhealthy as I thought it was, and we had a fantastic time. Stay tuned for more food highlights in Montreal, including my pick for best poutine!

Monday, June 10, 2013

How I Plan to Stay Healthy While on Vacation


Bonjour! J. and I are exploring the good eats and fun in Montreal this week! Here are some strategies I plan to use to stay healthy even while on vacation.  Next week, I’ll share with you how successful (or not successful) I was able to stick with it!

You may have noticed from my previous posts that my vacations are very food-focused.  In fact, usually before I go on vacation, I have an extensive list of restaurants and food places that I want to check out, that is organized by cuisine. 

And what are most of my vacation pictures of? Food.

IMAG0329

The Rancher Plate at the Salt Lick in Driftwood, TX

IMAG0157

King Crab legs, mashed potatoes and grilled asparagus from Chandler’s Crabhouse in Seattle

So I have to do something so I don’t gain 500 pounds! Here are some of my goals during my trip to try to reverse the effects of the poutine, Montreal bagels and perhaps the mysterious duck in a can.

1) Schedule a workout or two during the trip.  Back in 2009, when I made a trip to Austin for my friend Molly’s wedding, I learned that our mutual friend, La, who also made the trip to Austin for the occasion, regularly exercises while traveling.  Back then, I thought this was ludicrous.  I mean, it’s a vacation, I want to relax!  But now I’ve learned that working out while on vacation, just like in normal life, makes you feel good and gives you energy for all the fun activities planned for the day. So, La, if you’re reading this, I’m sorry I called you crazy and rolled my eyes at you.  Exercise while on vacation can be great!

This trip, I plan on taking a run on Mont Royale Park. On past vacations, I’ve found lots of cities have great parks for running in.  Like in Seattle, we took a run to Gasworks Park by taking the Burke-Gillman Trail. 

IMAG0082

View of the Seattle skyline from Gasworks Park

It was actually a beautiful run and a great way to see the city.

2) Plan activities that involve lots of walking. I’m keeping my fingers crossed that the weather will cooperate because from what I’ve been told is Montreal is a very walkable city! On top of that, on our way to Montreal, we plan on stopping in upstate New York to go for a hike!

maine hiking

A hiking trail from our trip to Maine

In past trips, we gone on hikes and we’ve taken fun walking tours, such as the Wicked Walking Tour in Portland, Maine.  I’ve also done the Underground Tour in Seattle, which is a lot of fun.  If we can find one, we may try to find a fun themed walking tour in Montreal.

3) Split an entrĂ©e/appetizer/dessert with J.  J. and I sometimes eat “family-style” at restaurants, even when we are not on vacation.  We order an appetizer and an entrĂ©e and share it between the two of us. (We ask the server the bring the appetizer with the entrĂ©e.) And we almost always share dessert.  (Which works out well for me because J. doesn’t have much of a sweet tooth and usually only takes a few bites of the dessert.)  This strategy works really well from a health standpoint, but also from a economical one too. 

IMAG0322

Fried chicken, mac and cheese that J. and I shared at Mrs. P’s Electric Cock in Austin, TX

5) Pack some healthy snacks.  Before our trip, I plan on picking up some nonperishables like nuts and dried fruit.  When we were in Seattle, we snacked on fresh cherries at the Pike Place Market.  In Montreal, the plan is stop by the Jean-Talon Market, and pick up some fresh fruit!

6) Relax. Something that I have always have to remind myself. Eating is an experience for me, and I want to experience as much as I can while I’m traveling.  So I may not follow every single one of these tips, but I’ll do the best I can, while still have fun.

Question of the Week:

  • Any other healthy tips while on vacation?

Monday, June 3, 2013

Swiss Chard with Eggs and Bacon

20130602_194635

Last Saturday, J. and I finally made it out to the farmers’ market for the first time this season.  With all the various weddings and birthday festivities occupying our weekends, we haven’t had much time to ourselves. Which also means we haven’t had much time to go food shopping, so a lot of meals have been either eating out or cobbling together what I have in the pantry and freezer.  Which has been taking a toll on our wallets and waistlines!  So I was pretty excited to finally get to buy fresh produce from the farmers market.

In an effort to get more vegetables in my diet, I decided I wanted to experiment with a vegetable I had never cooked with before.  J. and I eat a lot of bell peppers, zucchini, broccoli, and the occasional Brussels sprouts here and here.  But I wanted to try something new.

20130601_172443

Enter this Swiss chard from the farmers market. 

I have never cooked with Swiss chard before.  In fact, when I got home I had to google how best to store it. (Wrap it tightly in plastic and store it in the fridge.  Don’t wash it before storing it because it will wilt and get moldy).  So I polled the audience on Facebook on how best to cook it.  My sister’s good friend M. had made a beautiful suggestion, which she got from Animal, Vegetable, Miracle by Barbara Kingsolver:

“Saute some onions and carrots in a large skillet, add the Chard. When it wilts, make depressions in the Chard, crack eggs in the depressions, cover and cook until the eggs are done. Yummy!”

I was pysched to try it! I had to wait until Sunday to try it though, since we already had dinner plans for a friend’s birthday. I had read that swiss chard, like corn, is best when eaten the same day, so I was a bit bummed that I had to wait.  But it was well worth the wait!

I wanted to add a little something more to M.’s original suggestion.  And since swiss chard was a leafy green like spinach, and spinach goes great with bacon, bacon would be the perfect accent for this dish.

But Cheryl, you ask, isn’t this supposed to be your “healthy” post for the week?

Well, bacon is delicious and makes everything better.  And when used as in moderation as an accent, and most of the fat is drained, it’s really not that bad for you.  I believe it was Mark Bittman who even encouraged the use of moderate amounts of bacon to be used to season or accent food. 

Still not convinced?  Have a religious or dietary restriction on pork products?  Well, I’m sure this is still great without the bacon.  But the bacon adds a richness that makes it “soul-foody” as J. described it.  So unless you have a religious or dietary restriction, then I say go for it, eat the bacon.

Special Thanks to M. for the excellent suggestion!

Swiss Chard with Eggs and Bacon

Adapted from Animal, Vegetable, Miracle by Barbara Kingsolver

Ingredients:

  • 1 bunch swiss chard, thoroughly washed, ribs removed and chopped into 1 inch pieces
  • 1 small onion, finely chopped
  • 1 cup carrots, chopped (I used a handful of baby carrots, and thinly sliced them at an angle)
  • 2-3 garlic cloves, minced
  • 4 slices of bacon
  • 2 eggs (can cook more, but we only had two left in the fridge)
  • salt and pepper, to taste
  • cayenne pepper, to taste

Method:

In a large skillet, cook bacon to desired doneness.  Remove bacon strips from pan and drain on paper towels.  Set bacon aside.  Drain most of the bacon fat from the pan, leaving about one tablespoon in the pan to cook the vegetables in.   Reserve the bacon fat.  Cook carrots and onions in 1 tablespoon of bacon fat over medium-low heat for about 8 minutes, or until the onion is translucent and soft.  Add Swiss chard to the pan.  (You may have to add them in handfuls, allow it to wilt a bit, and then add more, to get it to fit in the pan.)  When the chard has wilted, push it to the sides of the pan, creating a “well.”  Add about 1/2 tsp of bacon fat (or you could use olive oil if you forget to reserve the fat).  Add minced garlic to the fat and cook for about 30 seconds before stirring it into the vegetables.  Make two little “wells” in the chard for the eggs.  Crack the eggs in to the “wells” and cover the pan.  Cook for another 4-5 minutes or until done.  Add seasonings to taste.   Crumble reserved bacon strips and sprinkle on top of the chard.  Serve immediately.

Other accompaniments I would add for next time would be to serve with a slice of good crusty bread, or perhaps with some parmesan or gruyere cheese on top.

Other useful links on Swiss chard:

Monday, May 20, 2013

Not so "overnight" oats

This post is part of a Healthy Living series that appears on Food Judicata on Monday evenings.  For more Healthy Living posts, click here


When I woke up last Thursday morning, I had a craving for cold and creamy overnight oats for breakfast. Only problem was I hadn't prepared any the night before.  Planning ahead fail.  Fortunately, I had read on Peanut Butter Fingers and on Amateur Gourmet (only AG called it "muesli"), that you don't actually have to soak the oats overnight!

I had a hard time believing that the oats and chia seeds would soften up enough, so I had to see it for myself. So I rolled out of bed, put on my gym clothes, and headed for the kitchen.  I poured oats, yogurt, milk, and chia seeds, and vanilla into a bowl...

My picture-taking skills at 6:15 AM at work here...
Then I covered it up, put it in the fridge, and headed for the gym!

One workout and shower later, (about an hour and 15 minutes) it looked like this!


Okay, I know, it doesn't look much different from the picture.  But when you added fruit and stirred it up, it looks how it does in the lead photo.

Topped with some fresh strawberries!
I had actually let the oats soak for a little longer than on PBF or AG, who both only soaked the oats for 30 minutes.  I found the oats were soft and chewy enough, but I noticed that the chia seeds that were on top were still a little crunchy! It added a bit of nuttiness to the oats, similar to poppy seeds.  Overall, I still prefer fully overnight oats, but this is a serviceable alternative for those days when I didn't plan ahead!

Monday, May 13, 2013

Spicy Tuna Melt with Avocado

This post is part of the Healthy Living series, which appears here on Food Judicata on Monday evenings.  Click here for other Healthy Living posts.


I ran the Newport 10k last weekend and made a new PR! My goal was to break my last 10k race time (my first!) of 1:08.12.19.  I shattered it last weekend by finishing in 1.03.53.64! I remember when I first starting running in the summer of 2011. Before that I had never run more than a mile, and that was in high school gym class. So it was a big leap for me when I registered for my first 5K, the World Trade Center Run to Remember on Governor's Island in September 2011, and started training.  My goal back then was to simply to finish the race without stopping.  I ran a 12:00 min mile pace for 3.1 miles.  And that was really hard!  Now I can run 10:17 minute mile pace for 6.2 miles!  I have to admit losing weight helped in my vast time improvement.  As J. always says, imagine running 6.2 miles with a 30 lb backpack.  That was what I was running with before.

In the spirit of healthy living and exercise, (and to make up for all the almond butter ice cream, and the leftover birthday cake I had for breakfast), here is a light and healthy twist on the classic tuna melt, which makes a quick and easy lunch.  I made this a few weeks ago after I did a trial kickboxing class at CKO.  It was a hard workout! And left me starving! So this lunch really hit the spot, without completely undoing the effects of the workout!

Spicy Tuna Melt with Avocado
(Serves 1)

1/2 can Albacore tuna, packed in water, drained (I used Trader Joe's no-salt added)
1-2 tsp mayonnaise (to taste)
1 tsp dijon mustard
salt and pepper to taste
squeeze of lemon juice
chopped pickled jalapenos, to taste (I used 3-4 slices and chopped them)
1 slice of cheddar cheese
1 slice whole wheat bread
1/4 avocado, sliced
Dash of cayenne pepper

Mix the first 6 ingredients in a bowl.  Toast bread and cheese in the toaster oven until the cheese is melted.  Top with the tuna mixture, sliced avocado, and dash of cayenne.

Tuesday, April 30, 2013

Snacks I've been obsessed with lately

I have a tendency to become fixated on things, for about two weeks, then when the novelty wears off, I forget about them. So in a way to help me remember these awesome snacks, I'm making a list.  And to prove to you how portable they are, I took these snacks to work and photographed them at my office!


This is my latest obsession.  I discovered them last Friday at Target, and I've had a bar everyday since, sometimes even two bars!  I love peanut butter and jelly, and I love granola bars, so I knew I would love these granola bars! What I like about Annie's products is that I can pronounce all the ingredients, so I can feel good about eating them.  Plus they are relatively  small and portion-controlled at only 120 calories a bar. 


Before that, I was obsessed with these toasted coconut almonds. (And yes, that is my keyboard and Lexis Nexis printouts in the background there.) I kept a can of these in the drawer of my desk at my office.  They are so good! They remind me of some sort of tropical cocktail. What I do to control my portions is a pour out a small handful into a cup, and then bury the container back in the drawer out of my sight.  The second step is key, or I would just keep eating them all! 


I've talked about yogurt with fruit preserves before for breakfast.  But you can also make your own "fruit-on-the bottom" yogurt cup.  Put a tablespoon of fruit preserves in a leakproof container, and pour in about 3/4 cup of plain yogurt. Cover and bring with you to work/school/wherever you need to go! (Okay, I took this picture in my kitchen at home, but I promise you I brought a tupperware of the stuff to work!) 

So there you have it, my latest snack obsessions.  What do you bring to snack on during the day?

Note: I was not compensated for mentioning any of these products.  I just really like them! 

Monday, April 22, 2013

The Great Greek Salad Debate

Last Saturday night, J. and I had a deep discussion on a topic of utmost importance: What goes in a Greek salad?

The Greek salad I have come to know has lettuce, feta cheese, kalamata olives, tomatoes, and cucumbers.  Bonus points for roasted red peppers, or regular bell peppers.  Meats, such as grilled chicken or lamb are optional.  My experience is based on New Jersey diners (many of which, are owned by Greek immigrants).


According to J, peperoncini is a key element to the Greek salad.  He bases his Greek salad experience   from a place called The Parthenon in Western Massachusetts, where he grew up. To me, this was preposterous.  Peperoncini is a product of Italy.  Why would you put it in a Greek salad? But J. insisted that because The Parthenon had peperoncini in their Greek salad, it was not optional.  

So in order to resolve this debate, I did what I do with any other heated dispute we have: I looked it up on Wikipedia. It turns out we were both right.  Or maybe we were both wrong.  According to Wikipedia,

 Lettuce, tomatoes, feta, and olives are the most standard elements in an American-style 'Greek salad', but cucumbers, peperoncini, bell peppers, onions, radishesdolmades, anchovies/sardines and pickled hot peppers are common. 

And if it was on Wikipedia, it had to be true, right?


Bell peppers and peperoncini are both common elements.  But really, it seems, as long as you have the core ingredients, that is lettuce, cheese, olives, and tomatoes, then you have a Greek salad. 

Here is what we put in a Greek salad:

Core ingredients:

Leafy greens (baby spinach or mixed salad greens, which ever we have on hand)
Tomatoes
Cucumbers
Kalamata olives
Feta cheese

Optional ingredients:

Roasted red peppers
Bell peppers
Peperoncini (I don't care what J. says, I still think these are optional)
Sliced red onion
Carrots (not traditional but we always seem to have them)

Question of the Week:

What do you put in a Greek salad?


Tuesday, April 16, 2013

Brussels Sprouts and Chinese Sausage

Last night, I just didn't feel right blogging about food.  My heart goes out to all those affected by the Boston Marathon bombings.  Although the longest distance I have ever run is 6.2 miles, I can only imagine the heartbreak of the runners and their loved ones on a day that was supposed to celebrate months of hard work and training, which turned to devastation and tragedy.  To learn more about how you can help, Julie at Peanut Butter Fingers has compiled some useful links and resources.  

This is what I would have blogged about last night: 


I've been on a bit of a brussels sprouts kick lately.  I've learned that brussels sprouts are best when cooked with a cured meat, such as bacon, ham, or corned beef.  But since I didn't have ham or corned beef handy, and all of our bacon was an icy frozen block in the freezer, I had to rummage through the fridge to find a good substitute.  Sure enough, I found a ziploc bag of Chinese sausage, or lap cheong. hidden in the back of the fridge.  Unlike breakfast sausage or Italian sausages, Chinese sausage is salty and sweet in a way that's hard to describe. While it is a little different in flavor from the Taiwanese sausages I grew up with, Taiwanese sausage is hard to come by unless you have a live-in Taiwanese grandmother in your house.  So it's good to have around a substitute to throw in stir-fries and fried rice.  When I was growing up, I remember my mom and my grandma would use leftover bits of sausage to flavor cabbage stir-fries.  So when I found the forgotten sausage links in the back of my fridge, I had a culinary epiphany! Chinese sausage  and brussels sprouts! Perfect. 

The rest was improvisation.  I sliced the sprouts into quarters and minced the garlic,  I thinly sliced the sausages on a diagonal just like my grandma used to.  But to season the sprouts, I mixed together my own concoction of fish sauce, soy sauce, hoisin sauce, and sriracha.  The combination of the fish sauce, soy sauce, and hoisin sauce mimicked the sweet and saltiness of the sausage, while the sriracha added just the right kick of spiciness. J. and I both loved how this dish came out. So I gave myself a virtual pat on the back, and mentally drafted how I was going to write this post.  

Today, I did a quick google search on "brussels sprouts and chinese sausage," which produced approximately 162,000 results, including this recipe from Steamy Kitchen, one of my favorite blogs. It turns out either I just reinvented the wheel, or on some subconscious level I was remembering reading this recipe.  

And here I thought I was so clever.  

Oh well, I still say this is a a great recipe, and I take full credit for my method and seasoning.  

Brussels Sprouts with Chinese Sausage

1 package brussels sprouts, halved or quartered, depending on size of sprouts 
3 links Chinese sausage, thinly sliced on a diagonal
2 garlic cloves minced
1/2 tsp sesame oil
1 tsp fish sauce
1 tsp soy sauce
1 Tbs hoisin sauce
a few dashes of sriracha sauce, to taste

Heat large skillet.  Cook sausage until fat is rendered (about 2 minutes), be careful not to burn it.  Remove sausage from the pan, while keeping as much of the fat as possible in the pan.  Drain sausage on a paper towel.  Return pan to medium heat.  Add brussels sprouts and cook until lightly browned.  (Try not to stir it around too much or it won't brown).  Push sprouts to the sides of the pan to form a well in the center of the pan.  Add sesame oil to the center of the pan.  Add garlic to the oil and cook for about 30 seconds or until fragrant. Stir garlic with the sprouts.  Add sausage, fish sauce, soy sauce, hoisin and sriracha to the mixture and toss until combined. Allow to cook for about another minute or until heated through.  Serve immediately with rice. 

Other Brussels Sprouts and Chinese Sausage of recipes (since apparently I am not as original as I thought I was): 

Monday, April 1, 2013

Guest Post: Lighter Mac and Cheese with Suvarna!

Please welcome my friend and law school classmate, Suvarna, who is also a lover of food and the law.  You may remember Suvarna from our earlier cooking adventure in 2009, when we made a delectable, but very rich baked mac and cheese. Here, we take on a lighter and healthier version. Enjoy!


As the readers on this site already know, Cheryl’s blog is called “Food Judicata – Food that has been judged.”  I’ve been and fan and avid reader of Cheryl’s blog since we graduated from law school because I too love food and civil procedure.  I think Cheryl has been so courageous in sharing her recent journey to a healthier lifestyle. She has inspired me and shared countless tips about calorie counters on phones, steaming vegetables, and portion control.  Accordingly, when planning my visit to Cheryl’s I challenged the both of us to come up with a recipe that would incorporate the ice cream from a local Jersey City ice cream shop, Torico.  Cheryl came up with the idea of making these delicious banana-split mini bites  and our cooking plans and my visit to Jersey City were set.

Right before our Jersey City day of cooking, I emailed Cheryl to check if she needed any ingredients.  Not surprisingly, she had everything we needed!  However, she did top my healthy ice cream recipe challenge with a healthy macaroni and cheese challenge!  Cheryl was kind enough to let me guest cook with her back in 2009, where we made a baked macaroni and cheese using this beautiful blue Le Creuset pot that I purchased with my Westlaw points. She thought on our second time cooking together, and in the spirit of healthy eating, we should revise or previous macaroni and cheese recipe with a new healthier one.  So we chose this one from Skinny Taste.  On a side note, Cheryl is a mac n’ cheese expert, having also made and written about the much loved dish in 2011. Then on the train ride up to Jersey City, I received a text from Cheryl asking if I liked asparagus.  I wrote back of course I do and that I loved the fact that it was a “spring” vegetable.  Thus, we added asparagus to our ambitious day of healthy cooking.

Upon arriving in Jersey City, I immediately realized what a fun place it is to live.  There was a huge sign at the train station announcing an upcoming Indian Holi celebration, food vendors, and so many cute shops and corner grocery stores.  Since Cheryl had all the ingredients for the recipes, and I just could not go to celebrate a new apartment empty handed, I stopped at a flower store to pick up some spring tulips.  I love flowers and since my mother is a tireless gardener flowers fill our home all year long.  Incidentally, Cheryl’s family is in the floral business and she has random knowledge about flowers – like the fact that tulips open during the day and shut at night!  Anyway I know I digress, I was so excited about seeing not just an ordinary ice cream shop, but instead “Torico Homemade Ice Cream Parlor.”  They have so many cool flavors like avocado, lychee, and ginger, in addition to the traditional flavors. 


After getting a grand tour of the apartment (what a gorgeous kitchen) and catching up (I think I hadn’t seen Cheryl in over year!), we got down to work.  The author of the recipe touted it as being kid-friendly and it did not disappoint!  We added spinach and used home-made bread crumbs.  Cheryl also added a secret ingredient – cayenne pepper – amazing.  The difference between the 2013 and 2009 recipe is visible – our new version looks not as greasy as the first and it tasted delicious. We may have made enough macaroni and cheese to last Cheryl and J. for the entire spring – but I suppose you can never have too much of a good thing! 

The cheese mixture with our "secret" ingredient
Ready for the oven!

The finished product
The recipe for the new and improved macaroni and cheese can be found here

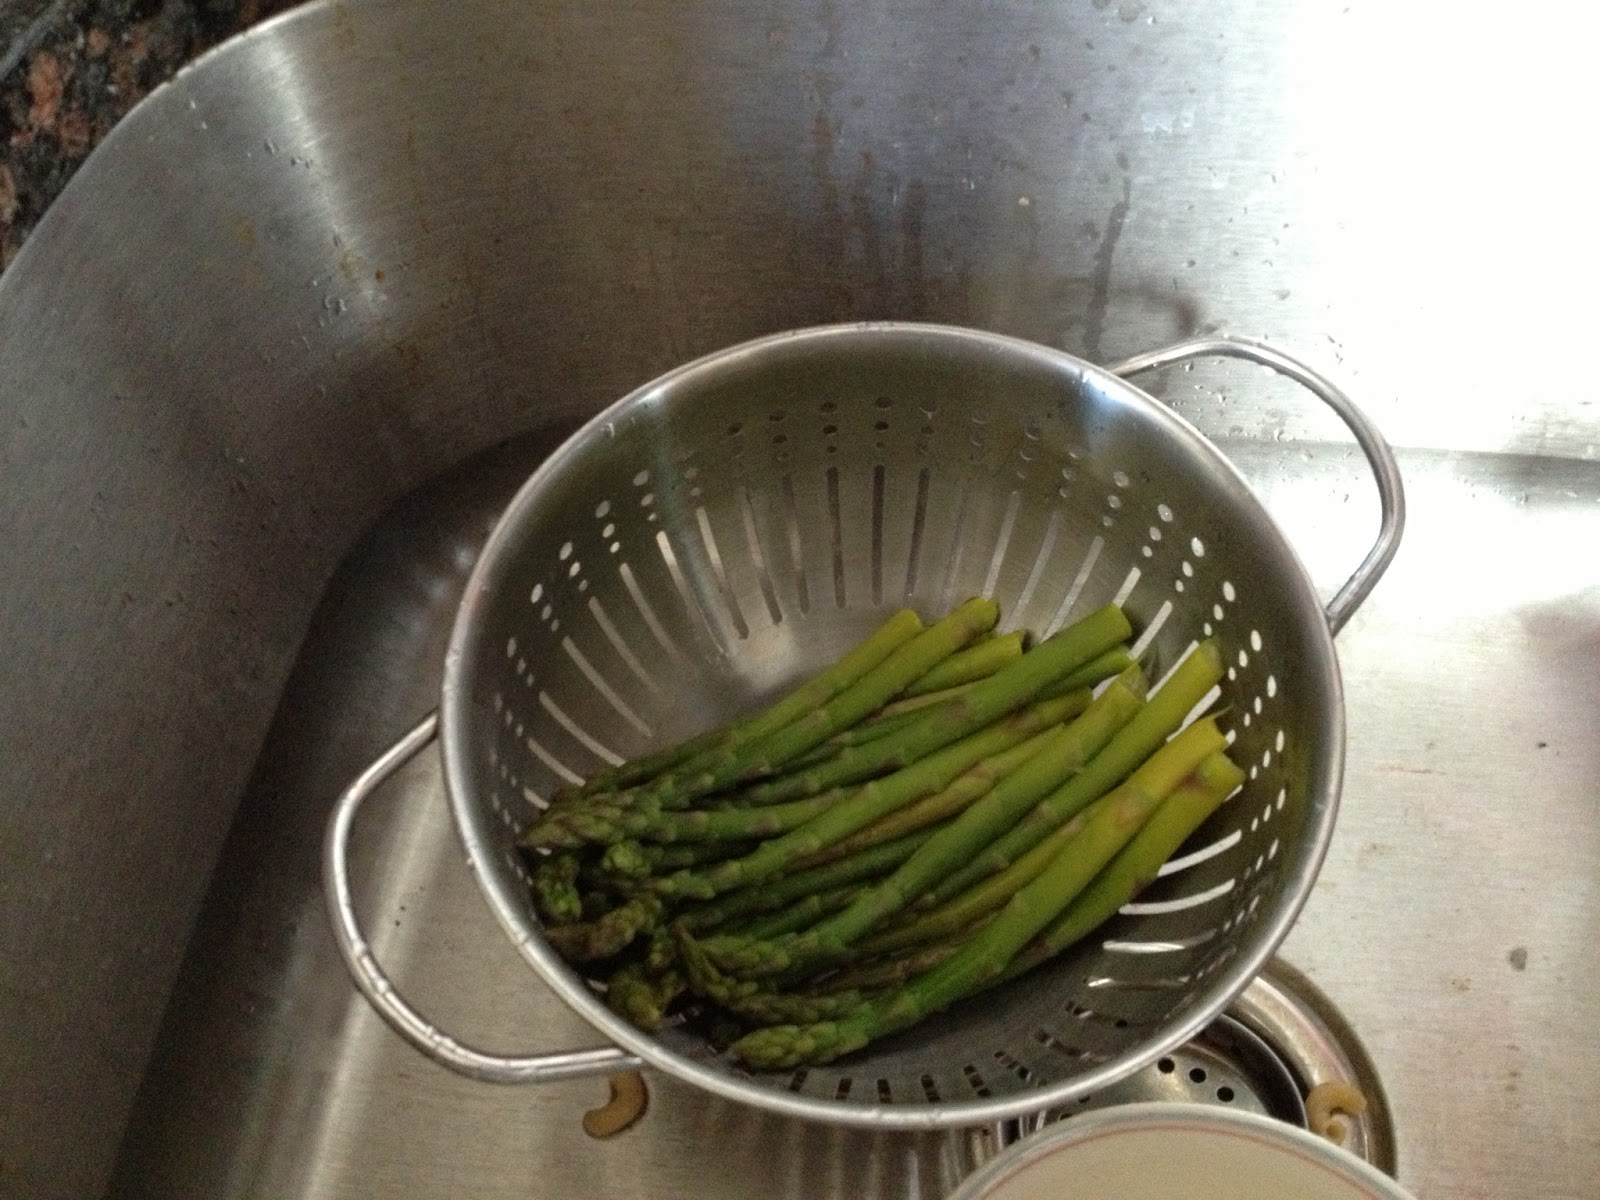
As for the asparagus, we steamed it, tossed it in olive oil, added some chopped raw almonds, and some salt and pepper (in Cheryl’s cool new pepper grinder).  Cheryl taught me a new trick where you run the asparagus under cold water so that it stops the cooking process and the vegetables remain crunchy.  

Asparagus after a cold shower


Unfortunately, after a busy morning of cooking, we did not have time to make dessert!  J. is one of the founding members of Jersey City Ties, “a new group for young professionals that focuses on fun social events, networking, and helping out the Jersey City community.”  The group was hosting a NCAA March Madness Event and so we ended our day of cooking a little early to go enjoy some basketball and meet up with new and old friends.  This is a really great group of people and anyone in the Jersey City area should check out an event if they have the chance.  I’m not too worried about the banana split mini bites, I’ll just have to make another trip to Jersey City in the summer – apparently the ice cream parlor is the place to be in the warmer months!!

On a final note, “Grazie Mille,” to Cheryl for being so gracious to let me guest blog once again, write my first ever blog entry, show me around Jersey City, and introduce me to a new great group of people.  Special thanks to J. for helping eat all that mac n’ cheese and raid his kitchen too!

Monday, March 25, 2013

Overnight Oats + Chia Seeds


This post is part of a "Healthy Living" Series that I have started on Monday evenings. Read more about the series and my journey to a healthy lifestyle here.  

What you see here is culmination of two things I keep coming across on my favorite healthy living blogs for the last few months - overnight oats and chia seeds.  I finally tried both of them for the first time last week. While I recognize I am late coming to the party,  I'm glad I made it, because together, overnight oats and chia seeds make an easy nutritious breakfast. Overnight oats are simply rolled oats (not quick cooking) soaked in liquid overnight (clever name, huh?).  Chia seeds are now making their reappearance into pop culture.  Yup, that's right, these are the same chia seeds that children "plant" on to animal-shaped pottery. Except now, they are being recognized for their nutritional benefits, are marketed as a "superfood," as opposed being recognized for the catchy jingle.  (Which anyone reading this who grew up in the US during the early 90s has running through their heads right now).

What's great about overnight oats is that it takes minutes to prepare the night before, so there is virtually no prep time in the morning and no cooking involved.  The time the oats spend soaking make them thick and chewy. When the chia seeds are soaked in the liquid, they become gelatinous, sort of like tapioca balls, which was made them good for adhering onto terracotta pots, but also good for giving the oatmeal a nice thickness.  So the oats start out looking like this at night....


And look like this in the morning!


Sorry, no matter how hard I try, oatmeal is just not photogenic.  You'll just have to trust me that it tastes good.

I had to play around with the ratios a bit and read up on a lot of variations.  The possibilities for spices and toppings are endless.  This version, which is adapted from Kath Eats Real Food, has been the best for me so far.  Below the recipe is a list of other versions that I plan to experiment with soon.  Don't be surprised if there is an Overnight Oats: Part II sometime in the near future...

Overnight Oats
Adapted from Kath Eats Real Food

1/3 cup old-fashioned rolled oats (not the quick cooking kind)
1/3 cup low-fat plain yogurt
1/2 cup 1% milk
1 Tbs chia seeds
1/2 tsp brown sugar/splenda blend (can substitute with 1 tsp brown sugar)
4 medium strawberries
1 oz blueberries (a small handful)
1/4 tsp vanilla extract
pinch of kosher salt
dash of cinnamon

The night before you plan to eat this, combine all the ingredients into a bowl and mix together.  (You could also save the fruit for topping in the morning, but I wanted to have one less step to worry about in the morning).  Cover and put in the fridge.  In the morning, put in the microwave for about 20 seconds on high to take the chill off it, if desired.  Stir and enjoy.

Other Overnight Oats Recipes I want to try:
Peanut Butter Oatmeal Cookie Dough from Peanut Butter Fingers
Pretty much all the variations from Kath Eats Real Food
Not overnight oats, but I really want to try this version of microwaved oats from Fannetastic Food